
Repairing Toilet Rim Silicone: How to Achieve a Clean Finish Using Bio Silicone and a Spatula
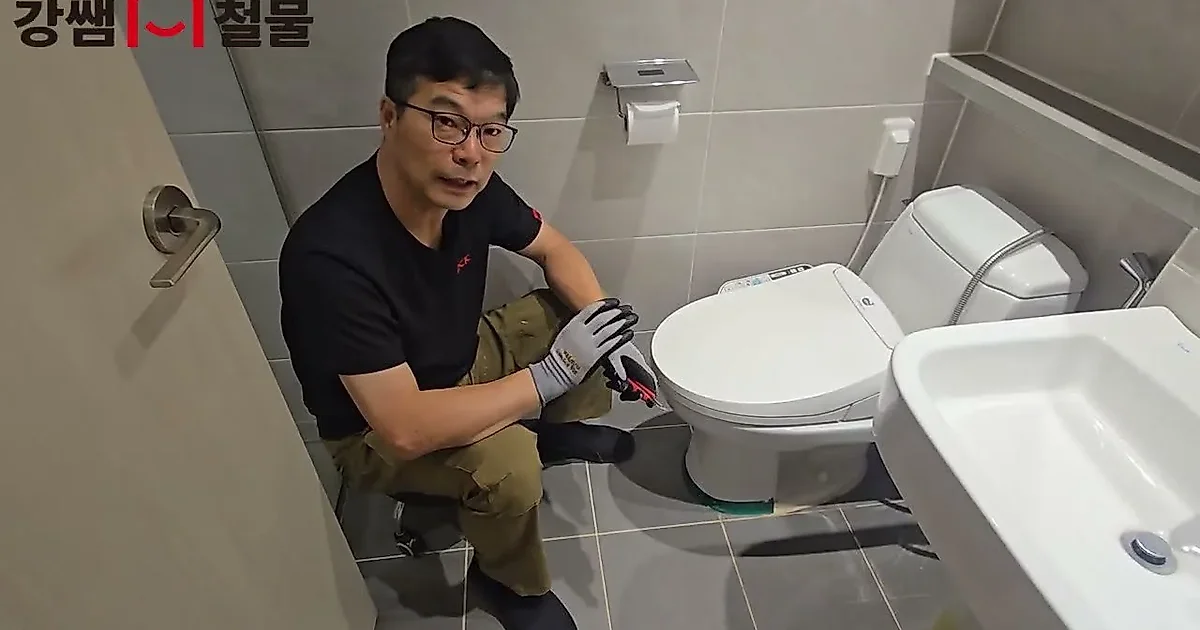
When the rim at the bottom of a bathroom toilet becomes contaminated or cracked, it is not only aesthetically unpleasing but also creates difficulties in hygiene management. According to the Gangssaem Cheolmul video, by removing the existing silicone and repairing it yourself using appropriate materials, you can maintain a clean state while reducing the cost burden.
Removing Existing Silicone and Maintaining Leveling
The first thing to do before starting the repair is to peel off the existing dirty silicone. The video shows the process of slightly lifting and removing the existing silicone. At this time, care must be taken to ensure the toilet does not shake.
If there is moisture on the floor at the bottom of the toilet or if the toilet is lifted because it is not level, the repair work may not be performed properly. The video mentions the importance of the process of placing something under the toilet to level it and fixing it so that the toilet does not move. The toilet must be stably fixed and in a state where it does not move so that the silicone can adhere closely and bond properly.
Utilizing Bio Silicone and How to Use a Spatula
Once all the existing silicone has been removed and the toilet is fixed, it is time to apply the new silicone. In humid environments such as bathrooms, it is recommended to use 'bio silicone' which has anti-mold functions. Using white bio silicone, which can be found at general hardware stores, is suitable specifically for bathrooms.
The method for applying silicone is as follows. Using a silicone gun, apply a generous amount of silicone along the rim of the toilet. Afterward, a tool called a 'spatula' (hera) is used to shape it beautifully. By pushing over the silicone using the spatula, the rim will be created in a smooth curved shape. If you do not have a spatula, you can also use wet wipes to refine the shape. However, any silicone that gets on the surrounding area during the work must be wiped off immediately to achieve a clean finish.
There are precautions to take after the silicone work is finished. It is advisable not to use water until the silicone has completely hardened. The video explains that after the work, you should leave the silicone alone for about one day to allow it to cure completely. Doing this will allow you to maintain the cleanly repaired toilet rim for a long time.
Related Articles

Folding coats ruins them... Seasonal organizing methods to extend clothing lifespan

Senior Home Organization: For Safety, Place Daily Items Between Waist and Eye Level

To Extend Galaxy Battery Life, Use 'Light Mode' and 'Battery Protection' Settings

When goose-neck faucet filters cannot be installed, an in-line filter under the sink is an alternative
Solve Groundwater Impurity Concerns by Replacing with an All-in-One Filter Faucet
Replacing USB Charging Outlets: How to Organize Neatly Without Adapters
The reason why adding two towels increases cleaning power when washing backpacks

Checking the size of the car behind you during lane changes helps identify the timing to merge
Kitchen upper cabinet shelf sagging: Reinforcement possible at any hole position using screw-type support pins

Organizing Expert Lee Jeong-won's Housekeeping Methods: Rediscovering Monitor Stands and Paper Shopping Bags

BODYFRIEND to Operate 55 Lounges and Pop-up Houses Nationwide During Chuseok Holiday

How to DIY Repair Worn Screws and Sagging Front Doors Using Professional Tools and Wires

How to remove a broken pipe thread inside a wall using a 1,500 won tool

Stricter Hospitalization Standards for Varicose Vein Indemnity Insurance: What Patients Must Check Before Treatment
Why Kitchen Organization Lasts Only When You Reduce Item Types Instead of Portioning Them
Housekeeping methods of a 58-year-old single-person household: Know-how to eliminate towel odors and bacteria using vinegar and EM

3 ways to securely hang hanging plant pots from gypsum board ceilings

10 Penalty Points for Failure to Use Turn Signals or Seatbelts... Intensive Traffic Law Enforcement to Begin in October

How to easily peel fresh chestnuts using 1kg of chestnuts, 1 teaspoon of baking soda, and a bottle cap

Comments 0